Whale Spotting – Project Planning
- Learn how software is designed and some of the types of functional or technical specifications used
- Create a simple software design from a project brief
- Consider the business context and needs for where the software will be used
- Plan the data structure for a project, including any databases required
- Learn how to create user stories from a project specification
Whale Spotting Project Brief
Recently we have finally seen an increase in whale numbers across the globe due to conservation efforts, and we would love to keep the public and scientific community engaged with these efforts. We have been tasked with creating a new website to help encourage and track whale spotting. The website should be able to grab and update current sightings data all across the world!
Requirements
- The application should pull in all data from the database and update for any new sightings reported.
- A user should be able to report a sighting of a whale.
- An admin should be allowed to confirm or remove a sighting.
We should encourage people/help people provide sightings and go out whale spotting, this could be by incorporating weather on the website to plan an outing – the client would like input here to come up with some good ideas.
As well as these it should also:
- Work on both mobile and desktop, while working well on tablets
- Be accessible to all users
- Work on all major browsers
Planning a project
In this module we will learn how to plan a software project. Then, using that knowledge we will plan the Whale Spotting mini project that you will work on for the next two weeks.
We will start by coming up with a design for the User Interface of the application. What pages it will have, what they should look like, etc.
Then we will design the System Architecture of the project. This is a high-level technical overview of how the system will be structured.
Finally we will produce a Code Specification. Which involves breaking down the designs and architecture into individual tasks and requirements. And making a more low-level technical plan on how to implement them.
The project will then be ready to work on!
Design Stage
User journeys
User journeys are a good place to start when designing an application. They are a sequence of steps that a typical user will take when using the application. They cover the overall sequence of events rather than what it will look like. Or even whether these events happen on one page or across several.
It’s good to make sure your user journeys cover all of the project requirements.
Some examples of user journeys could be:
Shopping website – saving items to your wishlist
- Browse products
- Open chosen product
- Click “add to wishlist”
- Product is now in user’s wishlist
Buying a train ticket
- Enter departure and arrival locations
- Choose train time
- Provide passenger information – number of adults and children
- Add any rail cards or discounts (optional)
- Reserve seat (optional)
- Enter payment details
- Receive booking confirmation
User personas
In an ideal world we would always be able to consult actual users when making design decisions. But this isn’t always possible, which is where User Personas come in handy.
A user persona is a made-up character who represents a typical end-user of the application. So if you are unsure on a design decision you can ask, “What would our user persona think of this?”
You’ll usually have a few user personas to get a representative cross-section of your userbase.
Some useful things to consider when creating with a user persona:
- How technical are they?
- How frequently do they use the application?
- What are their goals?
- What are their pain points?
- What will they be worried about?
- How will they be using the application? On desktop, tablet or mobile?
- Will they have a fast internet connection? Or even need to use it offline?
Exercise
As a team:
- document a few user personas for the expected users of the website; you don’t need to into lots of detail, but you should be clear about who the expected users will be
- identify the user journeys that should be supported by the site
Prototyping
Prototyping a project usually goes through the following stages:
Sketches
Sketches give a rough outline of how things will be laid out. They tend to be used by designers to explore ideas in the early requirement gathering stages. They aren’t typically officially presented to anyone like stakeholders.
They’re often just a literal sketch on a piece of paper like this:
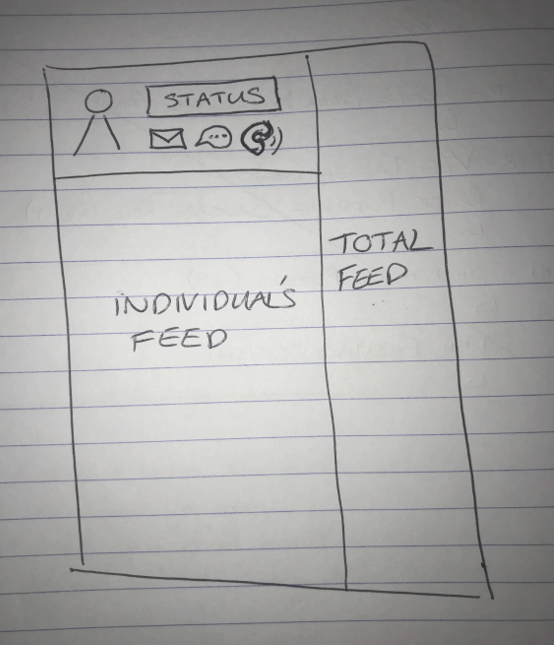
They should outline the key details of a frame rather than going deeper into the design. They are fast to produce but low-fidelity. They allow the designer to get their ideas onto the page.
Wireframes
Wireframes provide an early visual prototype. They can be hand drawn or made using a tool like this example:
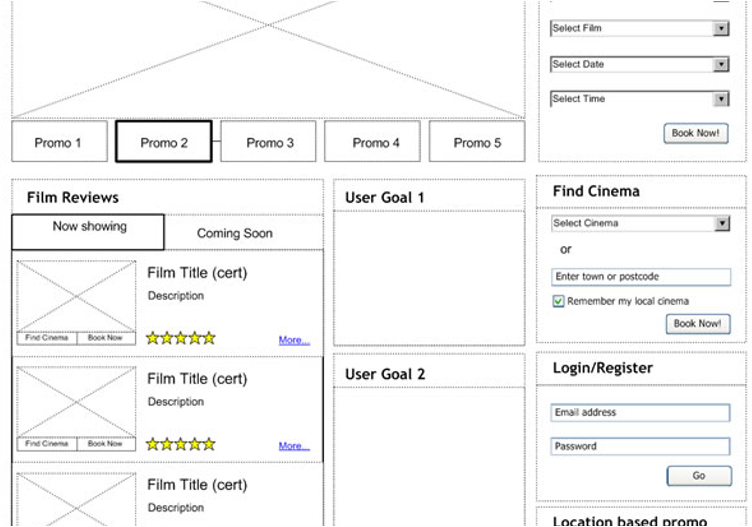
It’s not a full design so can still contain placeholders, but it helps to get more of a feel of the layout than just sketches. Some more sophisticated wireframes can link together to show simple actions. At this point stakeholders may be involved with the discussions with the designers.
Mock-ups
Mock-ups are the end result of the designer’s work. They finalise the layout and look of the application. They are high-effort and high-fidelity.
They will often be shown to stakeholders, and be used as a reference by developers. These are the sorts of designs you will work with most often.
Here is an example of a mock-up:
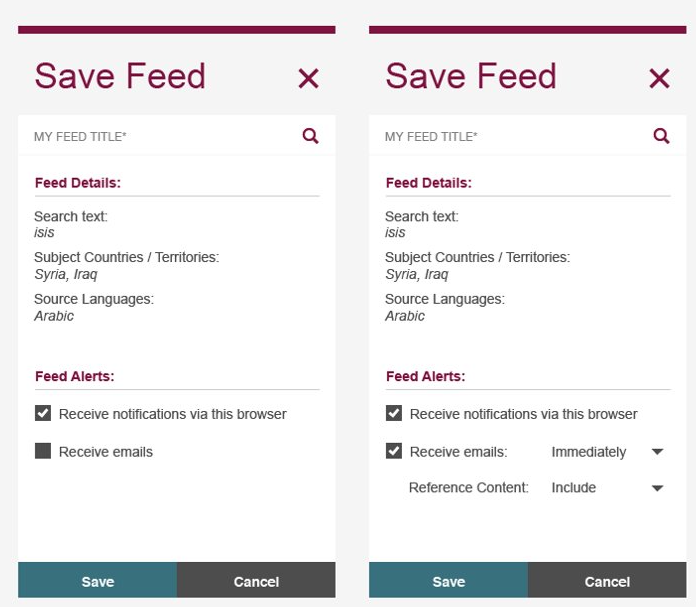
- It accurately mirrors the visual design and features of the product, but isn’t functional.
- It contains all of the visual elements, but is static.
- Sometimes you can simulate some simple UI element and screen transitions with mock clickable components.
- They are often very time consuming to produce, which is why it tends to be saved for the later stages of design.
UI and UX considerations
Here are some things to consider that make good UI/UX. You’ll cover UI/UX in more detail later in the modules but here are some brief things to consider:
Clarity
- Evenly distribute white-space and give plenty of room
- Use consistent colours, fonts and shapes
- Avoid clutter
- Use grids to help position things in line with each other
Direction
- Highlight important features
- Allow excess detail to recede
- Direct users along the desired path
Familiarity
- Things should behave as the user expects
- Use standard conventions and familiar icons
- Be consistent throughout your systems
Feedback
- Actions should result in visible effects
- Clear distinction between confirmations and errors
- Hard to present in a static design. Some designs will have separate diagrams off the main frame to show elements in different states like hover or click. Or if they are enabled or disabled.
Exercise
As a team, come up with some wireframe designs for the Whale Spotting App. Remember, you’ll only have two weeks to work on this, so don’t be too ambitious!
System Architecture
Once you have a design for your project, you can start to think about how to go about implementing it. In practice, this will often happen in parallel to the design stage. The two processes can influence each other’s outcomes. A System Architecture is a high-level technical plan for the project. They usually feature a System Architecture Diagram.
Why do we need it?
- To get a rough idea of the big picture before diving into development.
- To get a sense of how big a task it’ll be. This is particularly important for the commercial side as it will help with agreeing prices and timescales for the project.
- It gives an early warning whether what you’re trying to do is possible.
- To get an early sense of any pain points. Things that look particularly tricky, or atypical. Which means you can go into more detail when planning them to reduce risk.
- It’s a useful reference when working on the project.
System Architecture Diagram
System Architecture Diagrams show:
- What components there are
- How the components interact
- Which users interact with which parts of the system
So for example, a gym might have their systems laid out like this:
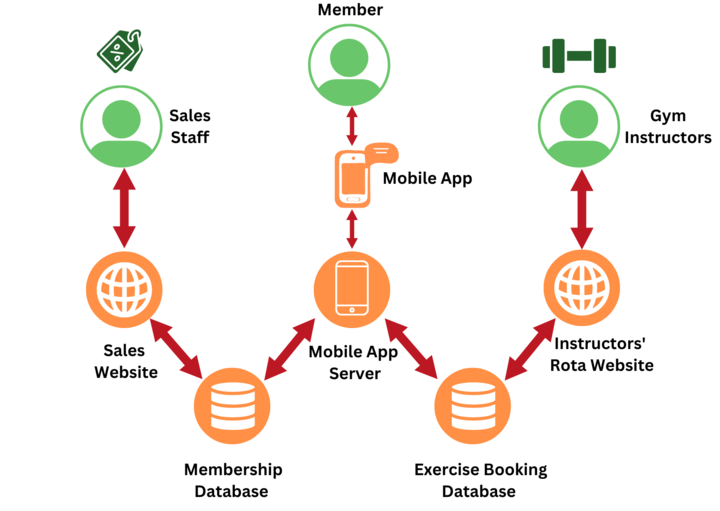
In this example there are three distinct types of user: sales staff, members and gym instructors. Because the sales staff and gym instructors are only concerned with completely different sets of data the decision has been made to have two separate databases. So the systems used by sales staff and gym instructor only need to connect up with the relevant database. For members there is planned to be a mobile app which will access a server which connects to both databases.
Other system designs
There are other aspects of system design that can be worth considering in more detail when designing a project:
I/O design
This is a design for what data enters and leaves the system. It covers things like:
- What data enters the system?
- What data needs to be extracted?
- Data formats
- Validation of data
- Transformation of data
Data design
This is a design for how you will structure data stored by the system.
- Data structures for the system
- Normalisation and database structure. What tables will you need?
- Entity relationships and multiplicities. One-to-one, one-to-many etc.
Security and control design
This is a design for if and how you will need to restrict access to your application.
- Data protection and access. Who should be able to access what data? How will unauthorised users be prevented from accessing data?
- Process isolation and validation. Ensuring processes aren’t interfered with. Verifying they have worked correctly.
- Security and audit
- Legislative compliance. Do you need to comply with any laws or regulations like GDPR? Will you be working with sensitive data?
Exercise
As a team, plan the system architecture for the Whale Spotting App.
Think about the controllers, services, repositories, views, and tables you will need to complete the project brief, as well as security and legislative compliance issues.
Task management
When planning a project, we normally break it down into small individual tasks. We normally write the tasks as “tickets” in a task tracking system like Trello or Jira.
Having this information is invaluable when planning a project.
- It means you have a list of what is required to be done and allows you to track the overall progress of the project.
- You have a canonical source of what was agreed will be delivered. This is very important for the commercial side of things.
- It helps share the work between multiple people. You usually assign tickets to individuals so you know two people won’t be working on the same thing at once.
- Tickets can usually be marked with progress. So being able to see a board with all of the tickets gives managers a really good overview of who is working on what.
- It also can allow the customer to see progress easily
- It’s also helpful for developers to be able to see what other developers are working on. So you can anticipate merge conflicts, make sure you aren’t repeating work. And if you’re stuck you can see if someone else has worked on something similar or solved a similar problem already.
The end result is a list of everything that is required, divided into small chunks of work.
Some project management methodologies such as Agile have a change-centric mindset and so wouldn’t expect this task list to be complete for the whole of the project, but would still need to represent the task plan for some period of time for the following reasons.
Who uses a project task list?
The Company:
- It gives a canonical source of what was agreed. This is invaluable for avoiding mis-matched expectations between the company and the customer.
- It allows them to track the overall progress of the project. If it’s on track in terms of delivery date and cost.
The Customer:
- Can see overall project progress. Is the project on track to be on time and on budget? Does the scope need to be adjusted to keep it on track?
- Being able to see progress on individual tickets lets the customer know which features will be available soon.
- Tracking bugs. It lets them see if a bug has already been reported and how soon it will be fixed.
Managers:
- Tracking progress – both overall for the project and on individual tickets.
- Prioritisation. The order of tasks can easily be changed as things become higher or lower priority.
- Assigning tasks to developers. It gives them an easy overview of what individuals are currently working and how far through they are. So they know who will need more work lined up.
Developers:
- Tickets have the requirements for the task and will sometimes contain some technical notes to point developers in the right direction.
- You can see what other developers on your team currently working on. So you don’t double up on the same task and can try to avoid or anticipate merge conflicts.
- You can see who worked on previously implemented features. Which is useful if you need help – someone may have already solved a similar problem.
How to divide a project into tasks
It can be difficult to know where to draw the line when splitting up a project plan into individual tickets. Here are some things to bear in mind:
- Keep tickets as small and simple as possible. Smaller pieces of work are easier to review and test. It also means you’re less likely to miss out any details.
- Required code changes should always be complete. The code on your main branch should be clean and tested at all times. Don’t raise separate tickets for adding tests.
- Tickets should always leave the app fully functional. So that the main branch is always ready either for live releases or manual testing. So it’s best to not use separate tickets for:
- Implementing on different screen sizes
- Accessibility
- Cross browser support
- If a feature is too large to be implemented all at once, you can hide things behind feature flags so that they are only visible when fully functional. Or you can work from the back end forward. So for example you might have a ticket for implementing an API endpoint, and a separate ticket for adding something to the front end that uses the new endpoint.
- Any dependencies should be properly labelled. So tickets are only assigned when they are ready to be worked on.
What Makes A Good Ticket?
- Well-written. Is it easy for the developer to understand? Even if they are unfamiliar with the project.
- Specific acceptance criteria. It’s important to have what has been agreed to be delivered to the customer available for the developer.
- Well-scoped. Is it clear to the developer exactly what’s required? Both so that they don’t miss anything out, but also so that they don’t write unnecessary functionality, or something that’s covered by another ticket.
Exercise
As a team, write tickets for the Whale Spotting App mini-project.
These will be the tickets you’ll work from for the next couple of weeks!
Code Specification
Many projects will undergo a detailed technical design phase prior to beginning implementation, in which the System Architecture and other technical designs that were specified earlier (such as data and security) feed into detailed and low-level designs of how each feature will be implemented.
This low-level design is a Code Specification for the feature.
This process is generally done for each ticket in the project’s task list, and the designs and decisions to be noted on the ticket, so that it is ready for a developer to implement once the things that the ticket depends on are ready.
It isn’t necessary for you to produce all your ticket technical designs at the start of your project, and that would be inefficient if there is a chance that the scope of your project may change. However, having a clear technical design that others on your team can see before beginning implementation is valuable to identify misunderstandings and risks.
Functional specification vs technical specification
After completing all the steps above you have built both a functional specification and technical specification of the application you’re going to build.
A functional specification defines what the application should do – so the user journeys, UI designs and feature tickets comprise the functional specification.
A technical specification defines how the application should be built – so it comprises the system architecture, I/O design, data design, security design and code specification.